Showing posts with label 2011-2012 Schools. Show all posts

Wednesday, December 14, 2011

Los Osos High School is Moving Strong!

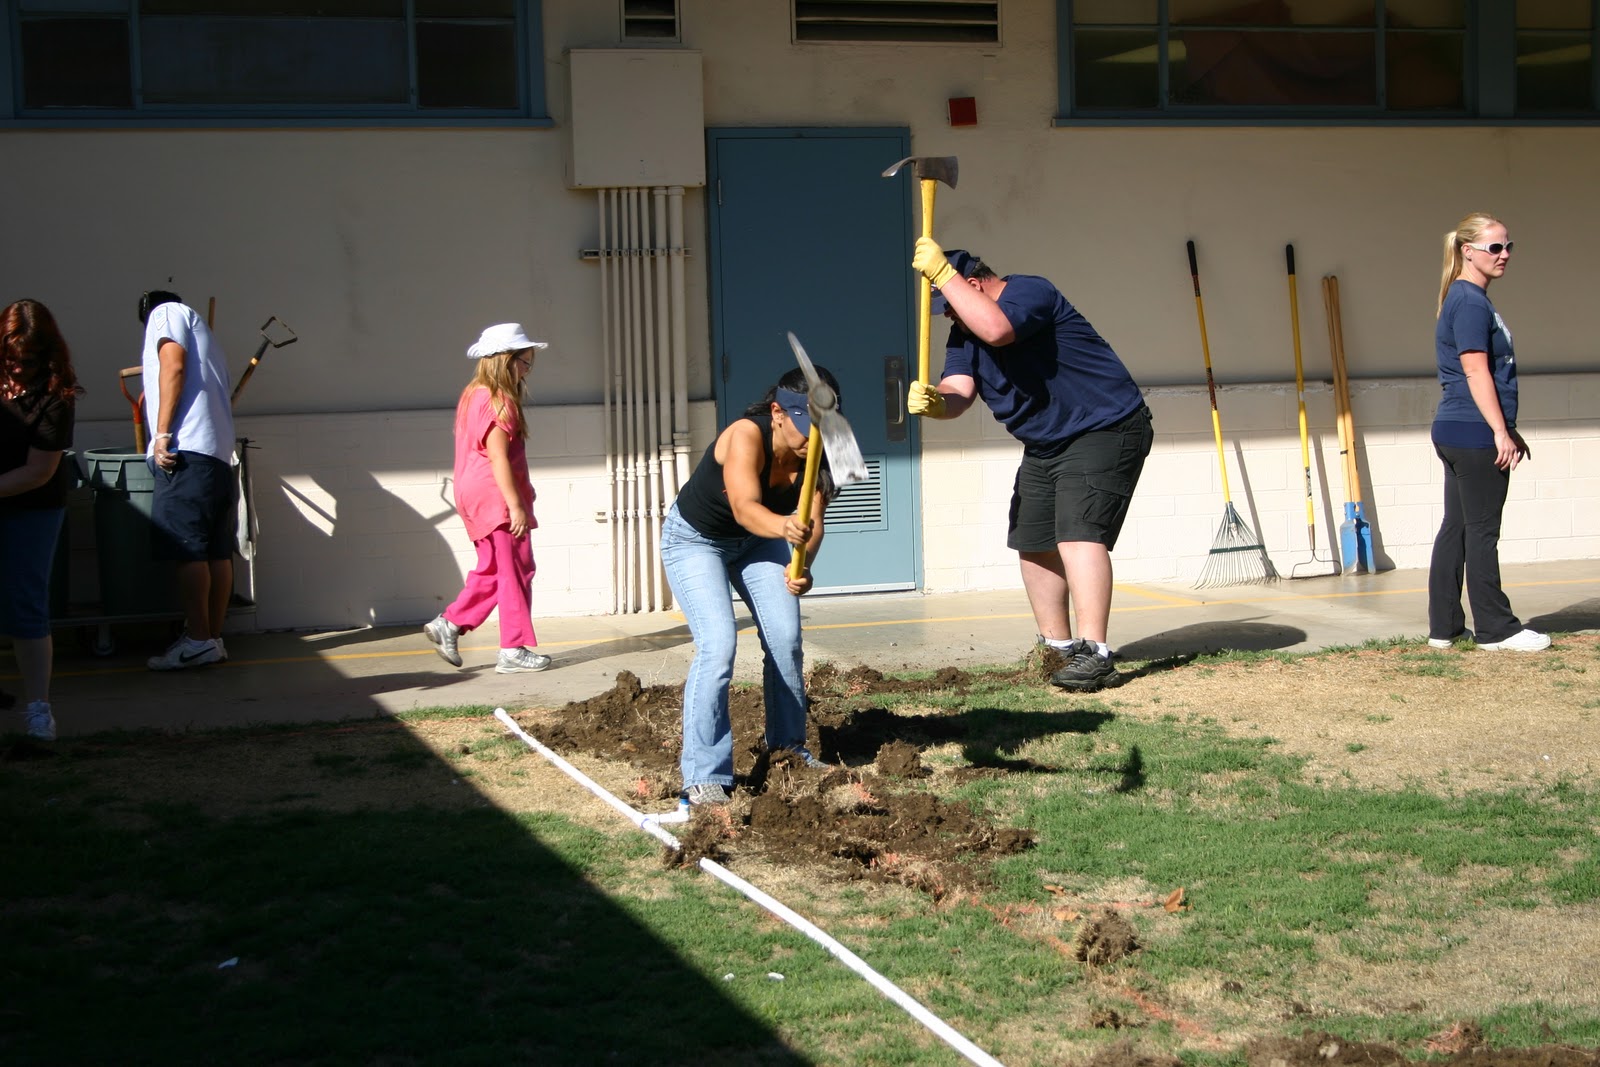
Volunteers trenching for irrigation.
Los Osos High School in Rancho Cucamonga is definitely a new type of experience for me in terms of administering the garden installation. While normally when we have volunteer workdays, we'll have a LOT of people attending, either a lot of kids or a lot of adults or both. Los Osos hasn't had very many volunteers. Interestingly though, they are quite dedicated to getting their garden installed. Even with only about 5 volunteers per workday able to attend, they've been moving at just about the same pace as the other schools with 20 - 30 volunteers.

Volunteers installing mediterranean herbs
 We've manage to be able to install about 50 plants, including 5 fruiting trees. We've installed all the underground irrigation for the site, and we've built six vegetable boxes and filled them with soil.
Volunteers building vegetable boxes.
 Not very many parents and teachers have been able to attend, but the few that have have been extremely helpful. Here we have a substitute teacher building vegetable boxes with his son.
Ms. Dolce installing the first plant, a navel orange.

Here is Ms. Dolce planting the very first tree of the garden just before thanksgiving break. This is a Navel Orange, Ms. Dolce subsequently installed all of the fruiting trees in the garden.

Friday, December 9, 2011

Upland High School Completed!

Avocado and Citrus at Upland High
 Well we finished the garden at Upland High(we actually finished in November). Here are a couple of photos I wanted to share with you all.

Upland High planted, a lot of fruit trees: Citrus, Avocados, Persimmons, Figs, and Pomegranates, all of which are drought tolerant and climate appropriate. They also received 14 vegetable beds. Because they only received a few trees and mulch we allowed for them to make up the rest of the grant in vegetable beds.


Vegetable beds at Upland High

Once we receive permission to share the photos of the kids working in the garden, we'll share them with you on this blog. Stay tuned for a dedication date as well! It was a lot of fun working with Mrs. McAdams and Mr. Whieldon and their students on this project.

Monday, October 24, 2011

Monte Vista Elementary School Garden Under Way!

Check-in!
This past Wednesday and the Wednesday before, we have been working hard at Monte Vista Elementary School's garden.
Pick Axes!

We have almost completed the irrigation and we have completed making 6 of 10 vegetable beds.

Star Trencher of the day!
Parent volunteers, teachers, and students all came out and worked very hard to get everything done on task and on time!
Parents, Teachers, Staff and Students all working hard.

Even Principal Dixon was out there early shoveling away.
Principal Dixon digging trenches!
A great turnout of volunteers!

Tuesday, September 13, 2011

Preliminary Design for Los Osos High School's Garden

Here is a preliminary design for Los Osos High's garden. I'm waiting to hear back on any changes and once I receive those, I'll post some more detailed images of the design.

Friday, September 9, 2011

Upland High: Making Vegetable Boxes.

 Today Upland High had a minimum day, so we had just enough time to make six vegetable boxes. Here are some photos of kids making boxes.We are careful not to show any kids' faces.


Putting the boxes together

Putting chicken wire on the bottom of the boxes to keep critters out.


Thursday, September 8, 2011

Upland High is moving fast!

A lot has been going on underground. Irrigation boxes hint to the work that was completed.

Brand new valves, pressure regulators and filters connecting to the new HDPE irrigation lines.

Underground Irrigation is IN! Next on the list are vegetable boxes.

Friday, September 2, 2011

Upland High Garden: getting things started.

Upland High began work on their garden today. We used tractors and volunteer students for a majority of the labor
Here is one of the tractors being used and students working in the background.

Here is Jennifer McAdams taking one of the tractors for a spin, she is the teacher who applied for the grant

Here she is again taking the larger tractor for a spin.
We have been spending the day removing turf, and I will be going back to spend some more time out there removing some more turf. Meanwhile Rick Abilez and his crew is getting water to us so that we can get irrigation in next week.

Thursday, September 1, 2011

Redeemer's Fence is Up!

Check out the fence and entryway that Redeemer put up last week.
 It was a great choice for a fence. It's tall enough to keep little ones out, but it is also short enough and well designed so that it does not make te garden feel caged in. (There's maleene picking some tomatoes for the school kids' lunch that day)
On the other side a hedge is also used as a natural border instead of continuuing the fence. This also gives it a sense of openness on this side of the garden.

Tuesday, August 23, 2011

Back to School! Things are starting to move!

Now that school is back in session, I have been meeting with all our schools for this year. I've already met with Upland High, Los Osos High, Monte Vista, and as you all know Redeemer Lutheran.

Everyone seems excited to get going and I'm excited to get working on some gardens. I'm currently working on a design for Upland High, tomorrow I'll be visiting Los Osos High to start a design, and on Thursday, I'll be revisiting Rancho Cucamonga High to see how they are doing.

Now that we're back in school, things are going to start getting really busy!

Thursday, August 4, 2011

Compost Bins and Kids

Redeemer requested a compost bin for their garden, and I think that is a wonderful idea. Teaching kids about compost is a great lesson in science. It can be one of the first lessons to teach kids about ecology and the importance of life cycles, symbiotic relationships, and also insects and bacterium. There are even books for teaching kids about compost.

A great book for teaching kids about compost is "Worms Eat Our Garbage." It's also great for adults learning about worm composting. Vermicomposting is one of the more interesting ways to teach kids about compost because they'll get to see worms eating the organic matter. In the end you'll also end up with some wonderful worm castings for your garden. Here is a link to Washington State Universities guide to creating a cheap and easy worm bin.
WSU's Cheap and Easy Worm Bin.

We'll be giving Redeemer a regular composting bin that doesn't take advantage of worms so much, but rather microorganisms and small insects to break down the organic matter. We'll likely be giving them a bin similar to the one below. These bins can be ordered at your local hardware or garden store.
Compost Bin That Rolls on a Platform
 These bins are very easy to use because they roll and tumble on a platform, there is no need to manually turn your compost with a pitch fork, which can sometimes be very laborious. My compost piles at home are made of old pallets, to form a box, and when it's time to turn the compost it's not the most fun. The benefit of pallet compost bins, is that they are cheap and often free. So if your school is strapped for cash, and you want a compost pile, this is the way to go. Here is a link to some nice pallet compost bins with some additional links on how too's from rootsimple.com. Here is also a link on how to make the simplest of pallet compost bins, like the ones below from livingofthegrid.org. You can always have the kids help make the bins and be in charge of turning the piles.

Livingoffthegrid.com's pallet compost bins.


Tuesday, July 26, 2011

Redeemer's Garden Update

I just received an e-mail from Maleene at Redeemer and she sent me a photo of her green bell peppers which she harvested this morning. Her kids had a chance to eat them right off the vine.
She also sent me a picture of the garden as it looks today (also a different angle than what I've been sharing). As you can see the corn is just shooting up.

Tuesday, July 19, 2011

Progress at Redeemer

I've been doing some work over at Redeemer getting their irrigation all set for when the fruit trees arrive. I wanted to test the lines to make sure everything worked before moving forward and we found a number of leaks. Now these aren't just leaks like leaky faucets where you have a drip a second that could lose 2700 gallons a year, these leaks were flowing water, so we made sure to repair them with a slip fixes pictured here. Fortunately the water here had been shut off for some time.  Unfortunately, Redeemer is a private school and does not have a staffed irrigation plumber. I was able to help them out here after wall, we want them to conserve water and not waste it.
Slip fix used to repair some pipes at Redeemer
Now, were there was once asphalt that is now removed, there is no existing irrigation. So the plan is to continue the line all the way down to the end. Where the pipe ends there is a slope that causes the pipe to reach the surface, we are going to have to bury the pipe to make it deeper or set the pipe lower here.  There is enough fill dirt available to bury the pipe instead of making it deeper, and because I'm worried about pressure loss I'd rather not make too many angles in the pipe. I'm using this High Density PolyEthylene(HDPE) pipe(the blue colored pipe) that is UV resistant to continue the line so it is safe being exposed to the surface, additionally, I am running it along a corner so it stays out of the way of a people walking by. It will likely be buried under at least a couple inches of soil and mulch anyways, but it's always best to play it safe.

Next step to connect the HDPE to the PVC
I am using this pipe for a number of reasons. The HDPE is more environmentally safe than PVC when exposed to UV, it is much faster to use saving me tons of time, and much cleaner, there are no chemical glues and primers needed to connect the fittings so I don't go home with purple fingers and there are no inevitable spills into the soil. Also because it is more flexible, there is less pressure loss when making soft curves rather than hard angles with traditional PVC. It also comes in rolls instead of long pieces like PVC, so it is easier to transport. The HDPE pipe has rigid walls and isn't to be confused with polyethylene drip tubing which is much more flexible and softer with no rigid walls (because it is low density). As you can see I have a long distance to go so reducing pressure loss is important. The down side to this HDPE blu-lock pipe is that since it is relatively new I have to make sure I order all the parts I need ahead of time, or I'll be stuck waiting. Also many fittings that are common for PVC pipe aren't yet made for this type of pipe so I have to make sure I know when it's appropriate to use Polyethylene vs. PVC.

A Bobcat, some HDPE pipe and a wall.
In that photo you can see the side of a Bobcat, Joe was also there moving some dirt around to make it easier to move around the pipe I had been working on. Tomorrow, Joe will be burying all the PVC and our next step is to wait for the trees that are being donated by Tom Spellman from Dave Wilson Nursery.

Tomatoes in their new cages.
Redeemer's Tomatoes are also growing quite well. At Maleene's request I brought over some tomato cages for them so that they have something to grow onto. Unfortunately The Home Depot has been sold out of the tall tomato cages for the past week so I wasn't able to supply them with those(it's that time of year where tomato cages go like hotcakes), but these will do fine for now.

Wednesday, June 29, 2011

First stages of planning a design for Redeemer.

The other day I met at Redeemer Lutheran with some of the volunteers on the project. We went over some of our plans for the garden, a small site analysis was done to find out what we can put where. Because of the location we found we have some restrictions due to sun exposure: than you to Tony Palmisano and Eleanor Torres' solar exposure model. Their orchard type garden is going to be on the west side of 2 buildings with only about 15 feet to a block wall. The building on the north end is a two story building so it is going to block out a lot of sun, the block wall is also higher at about 9 feet.
The North section of the "Orchard"
We thought some tall growing avocados may work well here so that they have an opportunity to reach for the sun. After some discussion we may actually go with some Fig trees instead. Figs are great for the region because they are a mediterranean fruit and we are in a mediterranean climate. Once they are established they will require no irrigation (Avocados don't require much but their leaves may brown). Figs are water wise and climate appropriate. Fortunately figs are deciduous so it will allow some sun light to get through in the winter. Their extremely soft wood also makes pruning nearly effortless.
Between the North and South Buildings
Between the two buildings we have an opportunity to place a row of espaliered citrus as suggested by Mary Petit who is well known for her involvement with community gardens in the area. By facing the espaliered trees towards the south they’ll be able to get enough sun, it may be possible to fit two rows close together and still be successful since the building to the south is at a lower elevation than where they trees would go just north of that. However that space may just be too small. I think it is worth a shot and while we may not get a lot of fruit off of the more shaded row, we may at least get some.
Southern orchard
In the southern portion, between the one story building and the short block wall, we’ll be able to place about 15 various fruiting trees. We haven’t decided exactly what, but Tom Spellman of Dave Wilson Nursery has announced he’d be able to donate a good portion of those trees if not all of them.
Joe was able to show me where all the irrigation lines ran and where we could connect off of the old irrigation. This area already has its own valve, so we luckily won’t need to put in another valve. With the drip that we are going to use we can control the amount of water at each tree with the shrubbler emitters that we use.

Redeemer's existing vegetable beds were just put in this spring.
Maleene also showed me a portion of their garden that they have already put together. They have vegetable beds that were just made and have already begun some plants. We’ll be supplying a short picket fence around the garden to help keep the vegetables from being trampled.
Right now I’m preparing their irrigation so that we can begin work with volunteers. Unfortunately, their soil has a LOT of rocks of all different sizes, it sometimes feels like I’m digging into gravel (which is not easy) sometimes I’ll hit a large rock and have to dig it out to move it out of the way. A lot of times soil type can make a job that can be done in one day with sandy-loam soil take 3 days with rocky or clay soils. The foothills are famous for their “potatoes” so we’ll see how it goes. Fortunately those "potatoes" can make great decorations!

Thursday, June 23, 2011

Redeemer Lutheran making strides early in the summer!

Joe Bartholomy removed asphalt at Redeemer
where part of the garden is to be installed.
The team led by Maleene Guida over at Redeemer Lutheran Church and School has already begun work on their garden over the summer. Joe Bartholomy who is a parent volunteer at Redeemer offered up some time and equipment to remove the asphalt where a portion of the garden is going to be installed.

We recently had a meeting with volunteers, school administrators and other community members as a introduction for all of us. We'll be updating you all on our progress as we move along.